[read Part 1]
Here’s the second half of the chair restoration story. I took a lot of photos and I’m gonna use them.
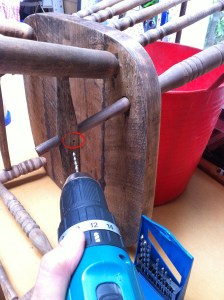
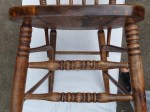
Using dowel plugs to strengthen a join
The chair had originally been nailed at the two points where the long outer uprights of the chair back passed through the side rungs. The nails would have helped hold the uprights in position. I didn’t want to use nails again. Instead I used dowels. Dowels can easily be drilled out if the chair needs repairing at some time in the future. Removing nails just makes a mess. The person who built the chair should have got a rap over the knuckles.
This is what I did:
- drilled a hole right through each rung and upright
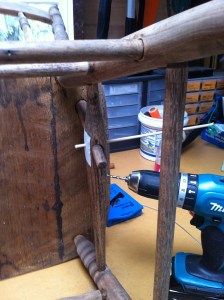
- glued in pieces of 4 mm dowel and then trimmed them
- filled the hollow on the inside of the rungs with melted wax, using a soldering iron, then scraped off the excess wax and rubbed it smooth
- sanded the dowel ends flush on the outside of the rungs


Applying the oil finish
 I like using Danish oil to finish off furniture. It’s incredibly easy to apply, and if you do more than the recommended two coats you can build up a lovely sheen.
First up I wiped down the chair with mineral turps. This gets rid of dust, dirt and greasy fingerprints. It’s also a handy way of showing you what the timber colour will be when the oil goes on.
I applied the oil by wiping it on with a rag and, after about 5 minutes, I wiped off the excess. It’s a really quick job but then you have to wait 8 hours before recoating. I did four coats all up, giving the chair a light sand before each one.
And that was it. Project done.

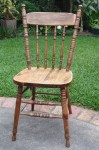
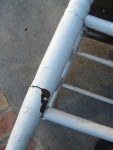
Before and after shots
Here’s a series of photos showing how the chair looked before and after restoring (you can click any photo to open the photo gallery). I like how the details of the turned wood are now so much sharper.


Happy birthday, Steph. Sorry your present was a bit late!


Bit late I know but you did a fabulous job 3rd Bit FTR. You have so much talent, you could make a fortune. Do you need a manager?
Thanks. Don’t need a manager but might need a bigger house if I keep finding new projects.
OH MY GOODNESS!!!!!, i know you told me about how much work went into it, but i do not think i realised just how incredible the whole process was! thankyou again, so sooo much, i really do love it. you are so incredibly talented! and your assistant isn’t bad either! X
Thanks, it was a pleasure restoring it for you. I just hope my repair work on the leg holds up. Let’s see if you’re still sitting on it on your 42nd birthday!
Lovely job – Steph should be pleased.
I have a similar chair Dad restored many, many years ago, which now needs a little TLC … so what’s your next project?
I think Dad went through a chair phase. I like the one he restored for me.
Brilliant work, 3BFTR. It must be easier to make a new chair than to restore an old one.
Thanks. I think there’s probably more satisfaction from restoring an old chair than making a new one. If I get stuck for a project I might offer to fix up the one you’ve got.