It’s taken me 5 years to get around to restoring this chair. It’s the third of four pieces of furniture I bought in Tarrington, near Hamilton, in June 2011. (The others are a wooden chest , a kitchen chair and a three-legged side table that’s still on my to-do list.)

Cleaning up the chair
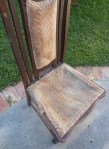
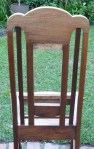
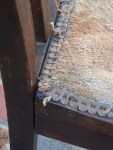
The chair was described by the shop owner as being oak. I could tell it wasn’t but it was solid and I liked the proportions and the carving on the backrest, though not so much the upholstery job.

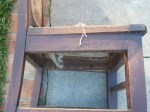
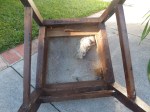
 Removing the fabric and cleaning off the dust and dirt was easy work. The seat was missing all its original springs, padding and webbing, which simplified the job quite a bit.
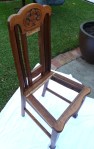
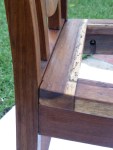
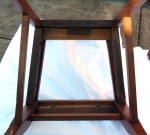
The good news was that the chair didn’t need to be completely knocked apart and re-glued. I did, however, separate the backrest/rear legs from the seat/front legs/rungs because there was some looseness. You can see the gap at seat level in the photo on the right.
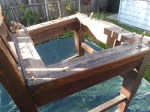
While the chair was in two pieces I stripped the old stain and sanded the wood. As I’ve learned over the years, stain hides a lot of construction sins. You assume the furniture will have been made from one single, lovely timber type but you uncover a mishmash of timbers, colours and grains. Still, I’m usually happy to live with that.
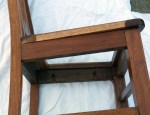
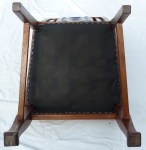
I filled lots of tack holes, particularly on the top of the seat frame. The last person to upholster the chair had extended the fabric well beyond where it should have been (easy to see in the photo above). In the photo below you can make out the slightly recessed area where the fabric is supposed to sit.
One piece of timber in the seat frame had borer holes in it – probably no longer a problem but I injected kerosene into every hole just to be sure.
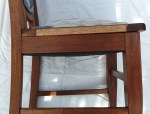
After I finished the sanding I glued the chair back together and oiled the wood with Danish oil.

Getting the chair re-covered
The downside of buying a cheap upholstered chair to restore is that it costs money to have it professionally reupholstered (unless you feel like learning a whole new skill, which I didn’t, at least not for this project). The upside, apart from the three-week wait, is you get a brilliant result.
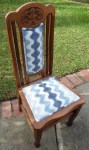
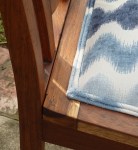
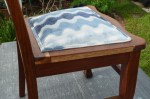
 The fabric I picked is from the Zepel Tide Collection. Initially I wanted something bright – greens and pinks maybe – but then decided on a colour scheme that would more easily complement other furniture etc. if and when we ever get around to renovating the house. It took 1.2 metres because the pattern repeat was relatively wide; otherwise 1 metre would have been enough.

The ‘Before, During and After’ presentation
Here’s a selection of photos showing the chair’s transformation. (You can click any photo to open the photo gallery.)


Beautiful work as always E. Love to have it in my home if you ever get tired of it! xxx
Nice job. Came up beautifully. Good to have the padding / springs etc. done by someone else. Who is the upholsterer?
Given that I had no idea how it should be reupholstered properly (springs etc. missing) it was easier to pay someone, but expensive. I used Camm Upholstery in Moorabbin. I might be teaching myself about upholstery for a future project – cut out the middle man.
Well done Bit 3 ! Looks great