[read Part 1]
We’d never covered a lampshade before. Still, how hard could it be, right? Hmmm … kinda hard actually.
Doing the research
There’s a lot of lampshade-making going on in the world, according to Google. These two sites were really useful – they gave us most (but not quite all) of the information and tips we needed:
- Martha Stewart – How to make your own lampshade video
- Design Sponge – Upholstery basics: how to make a lampshade
Finding the right lampshade frame
We wanted a rectangular frame but it wasn’t easy finding suppliers in Australia. Craft4Less (also trading as Arbee) stocks a good range of frames but only one rectangular frame. Luckily it was the perfect size. We ordered two online and saved on the delivery charge by collecting them in person from the warehouse in Mordialloc, Victoria.
 The new frames were bare metal but we wanted them white. We applied a metal primer, followed by two spray coats of white gloss. And we only bothered spraying the parts of the frame that would be visible, not the edges that would be covered by fabric.
Choosing the fabric
We didn’t need much fabric. The frames were 100 cm around and 20 cm high, so we could’ve got away with buying 30 cm but we bought extra to give us something to practise with. My fabric, which is linen, had a very wide pattern repeat. I bought 50 cm but 60 cm would have been better because it was a major exercise finding the best section of the pattern to use for the front-facing side of the lampshade. Moira’s is a lovely fine Japanese cotton and the pattern was easier to work with.
Understanding the fabric backing/stiffening
 Both Martha Stewart and Design Sponge talk about using something called ‘styrene’ to create a professional-looking shade. The trouble is I couldn’t find it anywhere in Australia. And a lot of people commenting on blog posts were asking ‘what the hell is this stuff exactly? Is it also called polypropylene sheeting?’.
The Craft4Less website sells a roll of ‘lampshade adhesive paper’, describing it as ‘insulating paper for covering lampshade frames’. But I didn’t want to spend $33 online just to find out it wasn’t suitable. I phoned Craft4Less and was told it’s also stocked at most Spotlight stores, which meant I could check it out first. And then I met a woman who makes lampshades for a living and she confirmed it’s the correct stuff. And it’s labelled as being polypropylene.
So, for the record, styrene = lampshade adhesive paper = polypropylene sheeting.
Getting your tools together
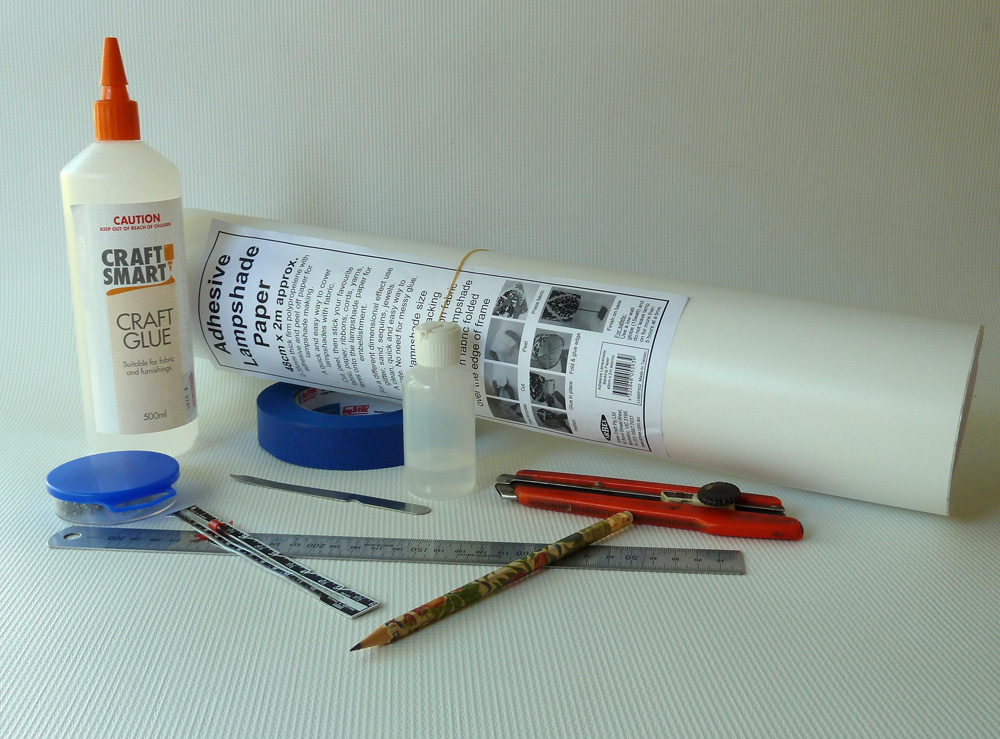
We used a large cutting mat, long and short rulers, pencils, scissors, Stanley knife, blue painters tape, pins, loads of bulldog clips, craft glue (and a small plastic bottle for decanting the glue into), a fineart paint brush, a scalpel blade, and tissues and rags for wiping glue off everything.
I did some research about what glue to use and also talked to a few people. No one seemed to say that one craft glue was better than any other. What you do want is a glue that gets tacky fairly quickly and – importantly – dries clear and is suitable for using on fabric. The glue we used was fine. I bought it from an art supply shop but then found it cheaper at Spotlight. A few negatives:
- It’s clear, not white, which made it a bit hard to see how much we were applying.
- It gets all over your fingers, even if you’re using a paintbrush or a stick to spread it, and creates long spiderweb-like strands whenever you move the glue bottle away.
On the upside, if you get any glue on the polypropylene you let it dry and then you can easily scrape it off with something like a scalpel blade.
Practising your technique
 I won’t go into much detail about how we covered the lampshades. It’s better if you watch the demo by Martha and her sidekick, and also read the Design Sponge blog post. My big tip, however, is to practise your technique first.
- Find an old lampshade and pull off at least part of the covering.
- Make a template of the lampshade shape on paper and use it to:
- cut a piece of fabric (use the fabric you intend covering your frame with), adding 12 mm seam allowances
- cut a piece of the polypropylene.
- Stick the two together, and then use bulldog clips to attach the piece to the frame.
- Glue the edges and turn them in, tucking them under the frame as Martha does, using a moulding wand (or, in our case, an old metal nail file).
You’ll find out pretty quickly that it’s messy work and that it’s not easy to do a neat job on first try.

Going round 90 degree corners
 Everyone online seems to be covering drum lampshades. We couldn’t find anything about covering a rectangular shade and how to manage bending the polypropylene. Do you just bend it or bend it with a sharp crease? We went with the rounded look (a) because it looks fine and (b) because once the crease is made there’s no undoing it; it’ll show up clearly when you turn the lamp on.
If you do decide to put creases in, do them one at a time. Work out where your centre front and centre back are, bulldog clip the covering piece to the frame and mark where the first crease needs to go. Take the cover off the frame and make the crease. Repeat for each of the remaining corners. (This is hypothetical; I haven’t tried it but it’s what I would do.)


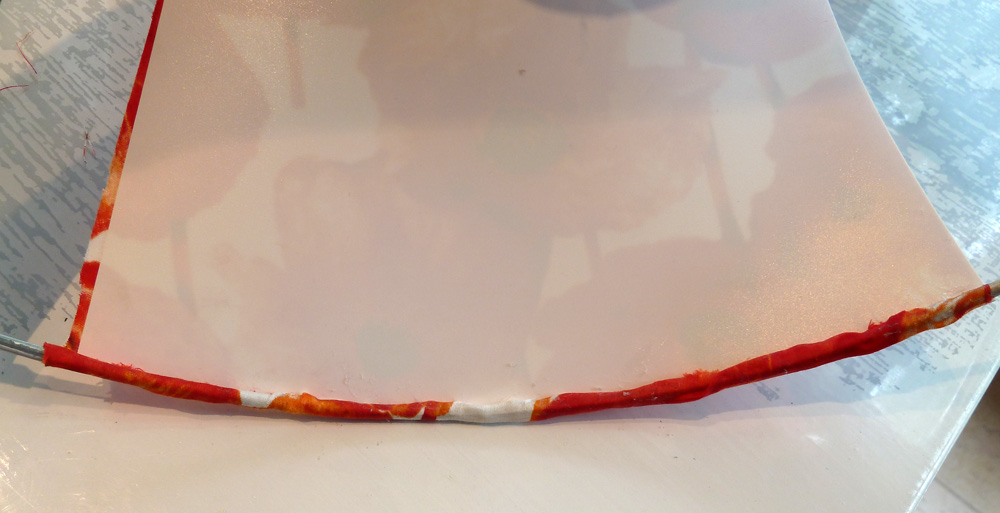
Gluing and turning in the edges
 A twelve millimetre turn-in allowance is enough, especially if you follow the Martha Stewart method of tucking the folded fabric back under the wire frame with a moulding wand (aka metal nail file). (The Design Sponge blog post walks you through using bias binding trim instead.) Where you need to be careful is in the spots where you have to work around the vertical parts of the frame – you can’t tuck the fabric under when there’s a piece of metal in the way. You just have to make it happen as neatly as possible. Practise first!

Using the nail file to tuck the fabric under the frame
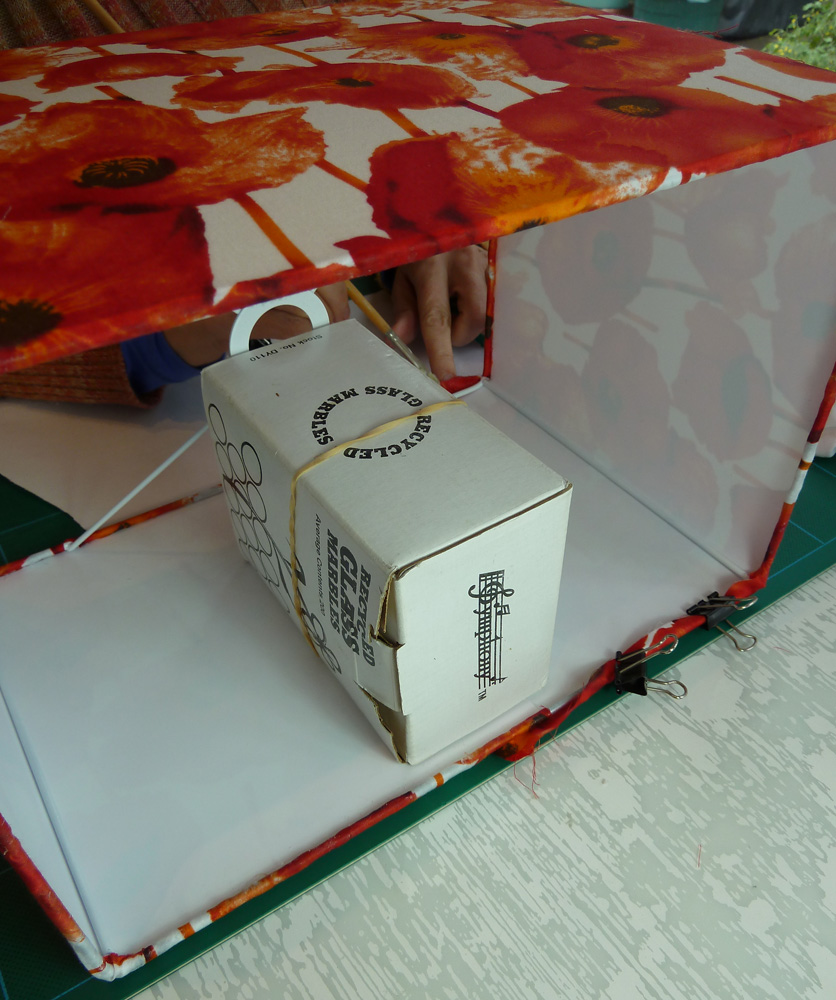
Using a weight to put pressure on the point where the fabric ends were glued together
An alternative to tucking the fabric under the frame is to simply glue and fold the fabric over the frame and then glue some narrow trim (such as grosgrain or thin elastic) over the raw edges on the inside of the frame. I used this method for mine and it looks great.
All done!


Seen yours in your house. Also love the poppies – one of my most loved flowers.
Finally read these. Lots of work and beautiful end products. Good job, you and Moira.
Love it, good effort by all involved.
Thanks. It was a team effort all round.
Looks great. Love the fabrics too. I’ve bought sample products called Mod podge, which are meant to do this sort of thing. I haven’t used them yet though. I bought them at a craft show in Melbourne – as you do when retired.
Thanks v much. I’ve never heard of Mod Podge but I’ll take a closer look. (Didn’t know about the retirement either!)