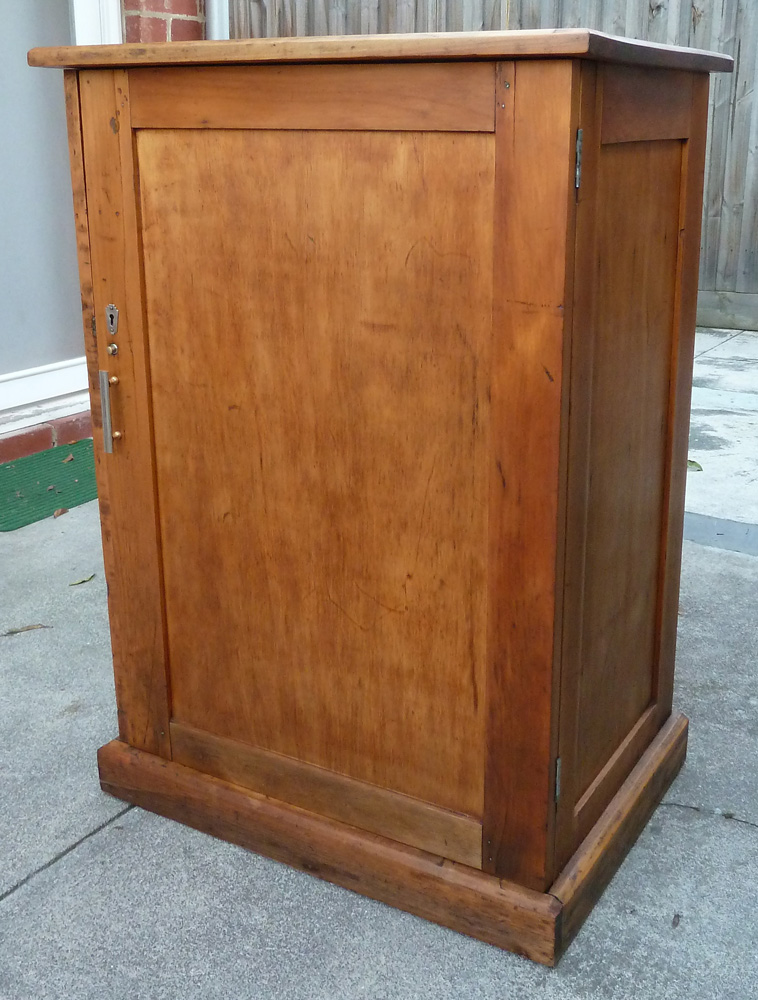
The cupboard I bought at Mt Buffalo last month is now restored. It took quite a bit of effort for a piece of furniture that is – honestly – not the most brilliant example of cabinetmaking.
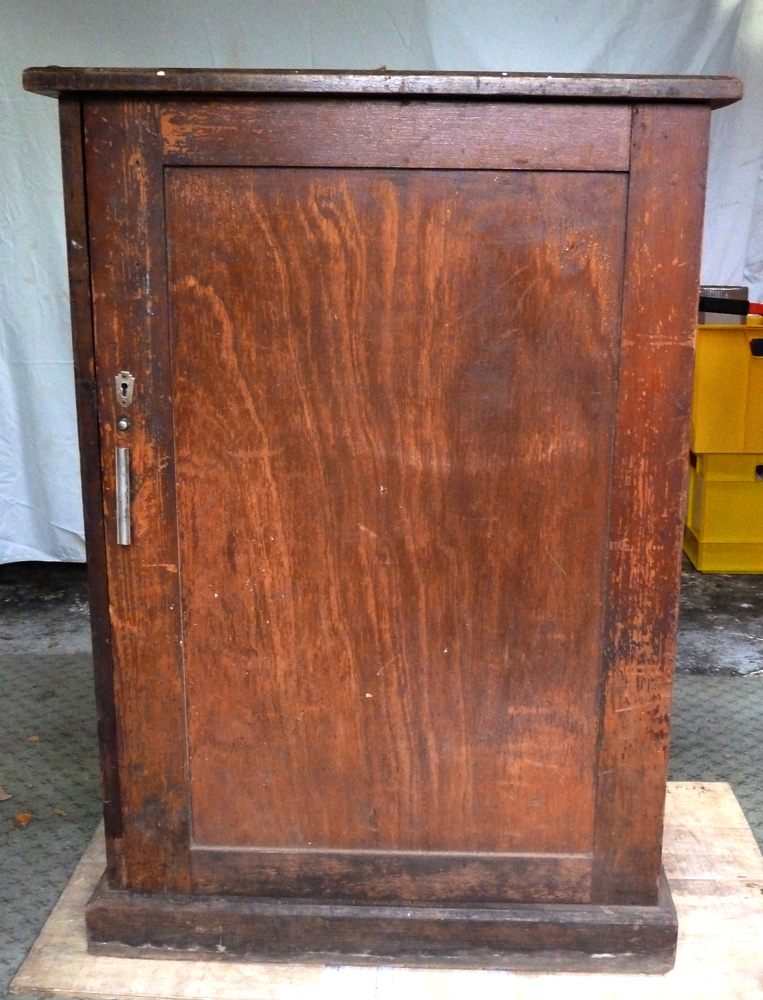
It’s hard to imagine what this cupboard would have looked like when it was originally built. There are tell-tale signs that it wasn’t ever intended to be a fine woodworking piece. The cabinet top has a narrow strip of joined wood running across the back edge, as though someone ran out of the right timber, and the whole top has been nailed straight onto the carcass. There are odd gaps and bad joins around the base of the cabinet and the interior varnish has been applied sloppily.
At some stage at least one of the shelves must have been refitted. And the door looks like it got opened back too far one day and it split – it was repaired with glue and nails. Still, the cupboard is part of the Mt Buffalo Chalet story and that makes me happy.
What I did

- Cleaned the inside with my furniture cleaner
- Removed all fittings (handle, hinges …). My assistant then cleaned them with a buffing wheel and metal polish
- Stripped the varnish off the outside of the carcass and both sides of the door
- Sanded the timber with a detail sander and by hand
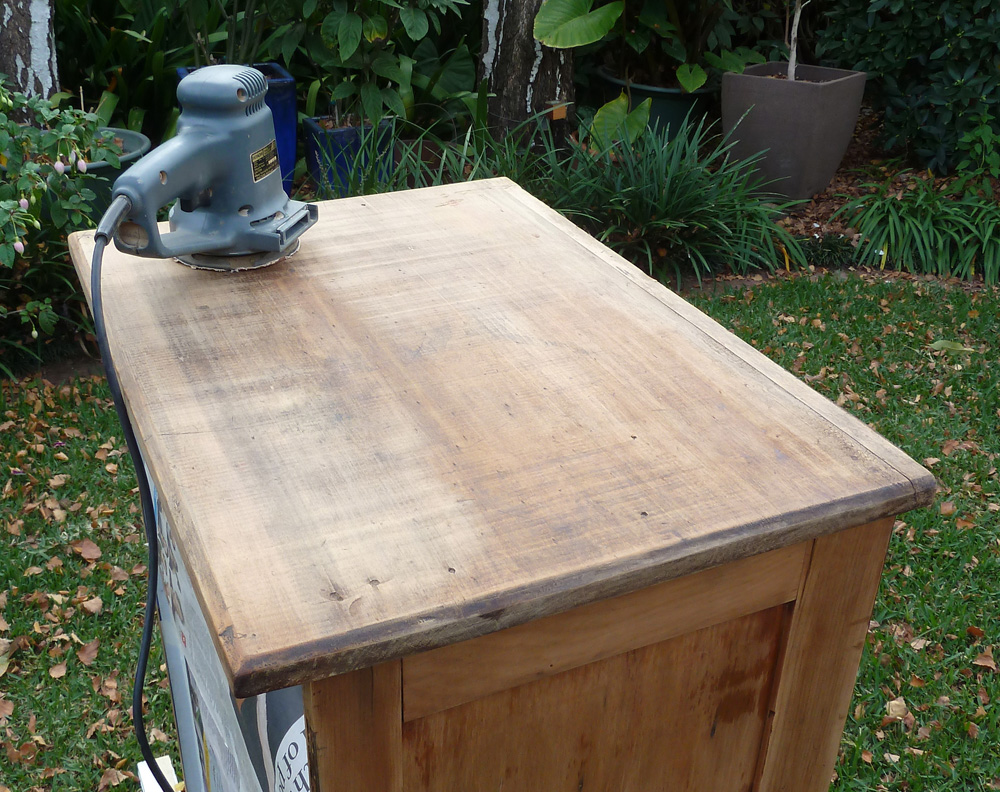
 Used an orbital sander with a really coarse grit (80) on the top of the cupboard because it needed a lot of work. The sander cut through all the main stains but created fine circular sanding marks everywhere, which I then had to remove manually with a sanding block. Not good for the shoulders and neck
- Filled holes with wax melted with a soldering iron, and used Plasti-Bond to repair damaged edges around the base
- Cleaned up all the bare timber with turps
- Applied two coats of Danish oil then two coats of beeswax.
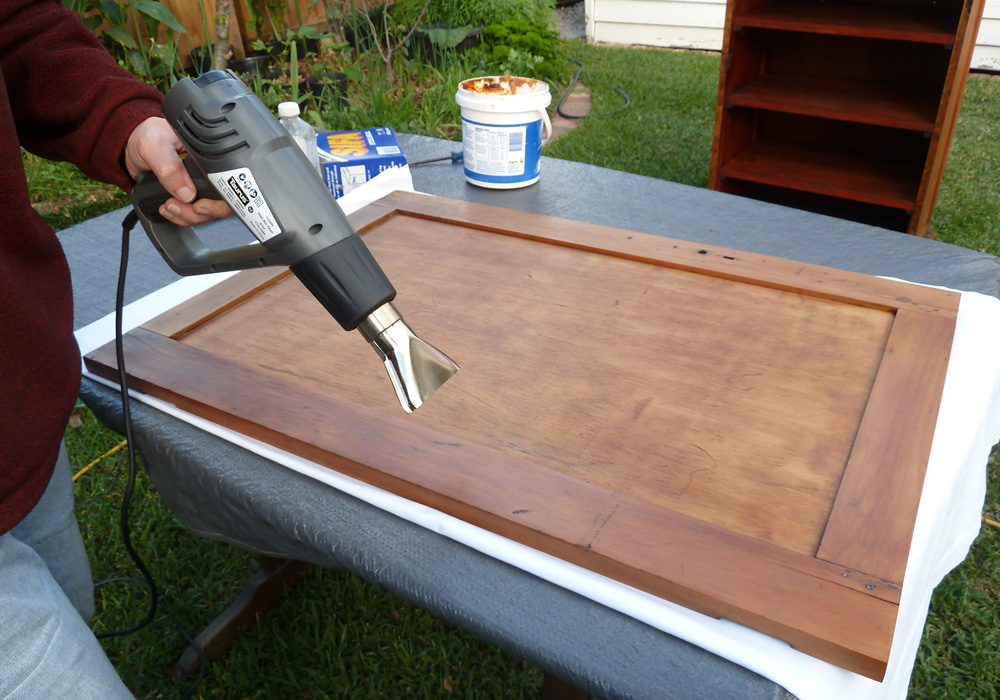
Applying beeswax – the heat gun method!
 The restoration work was standard stuff. The beeswaxing stage, however, didn’t begin well. I’ve used beeswax a lot but this time there were problems. To start with, I didn’t get the wax soft enough with turps, which meant I was putting it on too thickly. And it was relatively cold and overcast outside – the wax just didn’t want to budge as I buffed it. I was staring at a mess.
Plan B: Bring in the heat gun.
This was a two-person job. My assistant warmed the wood and I followed behind, applying the beeswax with steel wool, section by section. Then when the wax was ready for buffing we used the heat gun to warm it first – effectively melting the wax. The buffing was a breeze. It was hilarious. I have no idea if other people have tried this method but it works pretty well, thank you. I doubt I’d try it on special projects but with this cupboard I didn’t care – I needed a rescue plan and we found a brilliant one.
Before-and-after slideshow
I’ve included quite a few photos showing how the restoration work went.
(The slideshow moves pretty slowly so you might want to hover your mouse over any image and then click the forward arrow to jump through them more quickly.)

I am informed that the correct reference is TA (trades assistant).
Duly noted.
Nice silk purse from sow’s ear ( or buffalo’s rear) – you and assistant have excelled again.
Did you leave the numbers on the back? I wonder if it was an inventory number.
Where are you putting your latest piece? Is there any room left in the house?
Thanks. It’s an odd little cupboard. The photos are more flattering than they should be. I purposely left the number on the back, though I slipped with the cleaner and rubbed off a bit too much. A park ranger told us that many of the chalet furniture pieces had an inventory number but we got the impression the number would be found inside, not outside. The cupboard is in the study, just squeezed in! Some design layout work is in order to improve the effect.